Installing CentOS For Asterisk
This article will discuss how to install CentOS step by step in order to set up an Asterisk box. What things you might want to change in order not to have problems while installing or running Asterisk, and finally some tips that you might find useful.
While Installing CentOS is a very straightforward and easy task (and surely there is a plethora of tutorials out there) I decided to make my own guide in order to use it as course material when helping friends (special thanks to my friend Floriana Gregora, for encouraging me to this and other tutorials that I’ll be creating) or the community in general in their process to learn Asterisk. I’ll be using VirtualBox in order to install CentOS as a virtual machine and will be assuming an installation from the DVD media (or .iso file)
Inserting DVD media or ISO File
First, start the virtual machine and insert the DVD media or choose the .iso file as installation source. Afterwards you will be asked to chose an option from a menu. Choose the first option: “Install or Upgrade an Existing System”

Install or Upgrade an Existing Image
Testing Installation Media
You will be now asked to test the installation media. You can skip that if you want (if you are sure that your installation media does not contains any error):
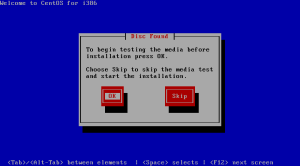
Test Installation Media
Starting Graphical Installation
The next screen will show you the first step of the graphical installation process (if you chose the first option in the first menu) to which you just have to press “Next“. Note: if you do not have enough RAM for your server/virtual machine, the basic installation mode will be used.

Step 1 – Graphical Installation Process
Choosing Language and Keyboard Layout
Choose your language and keyboard layout in the next 2 screens:

Step 2 – Choose Language
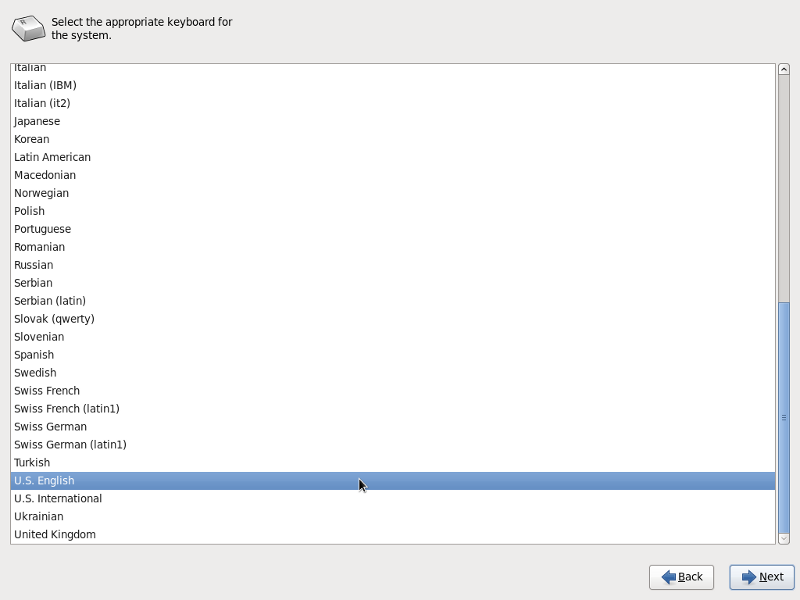
Step 3 – Choosing Keyboard Layout
Type Of Devices
Now, indicate the type of devices that your installations will involve (I’ll chose the first one here). If you are going to be learning/working something related to datacenters or virtualization, you might want to chose the second option:

Step 4 – Device Types
Keeping/Discarding Previous Data
The installation might ask you to chose whether or not to discard any information you have on the disk. In my case I’ll chose to discard it (it’s a new Virtual Disk):
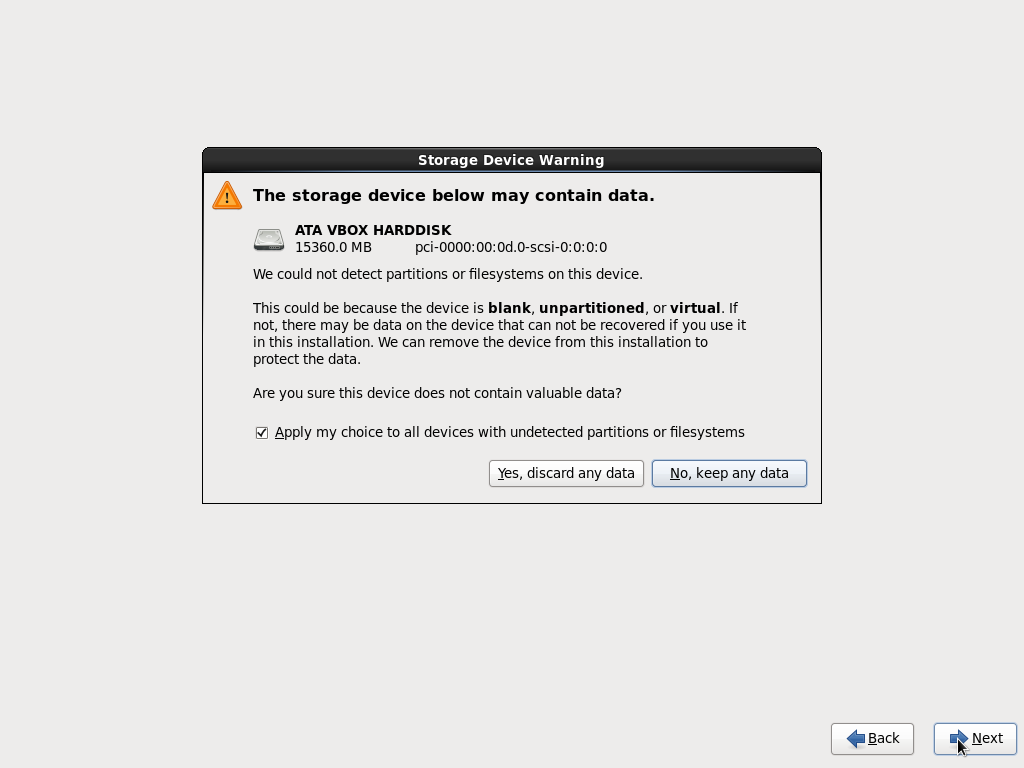
Step 5 – Discard/Keep Data
CentOS Network Config
On my installation, I’ll leave the network settings intact because I’ll be working on a virtual machine and the default configuration provided by VirtualBox via DHCP fits my needs (at least for now). I used “centosbox.localdomain” as my computer network’s identifier:

Step 6 – Network Identifier
Click on “Configure Network” and a little dialog will appear so we can select our interface (in this case, eth0) and press “Edit“. On the next dialog press “Connect Automatically“, and Apply your changes. The idea is to have the interface connected automatically when the server/virtual machine boots:
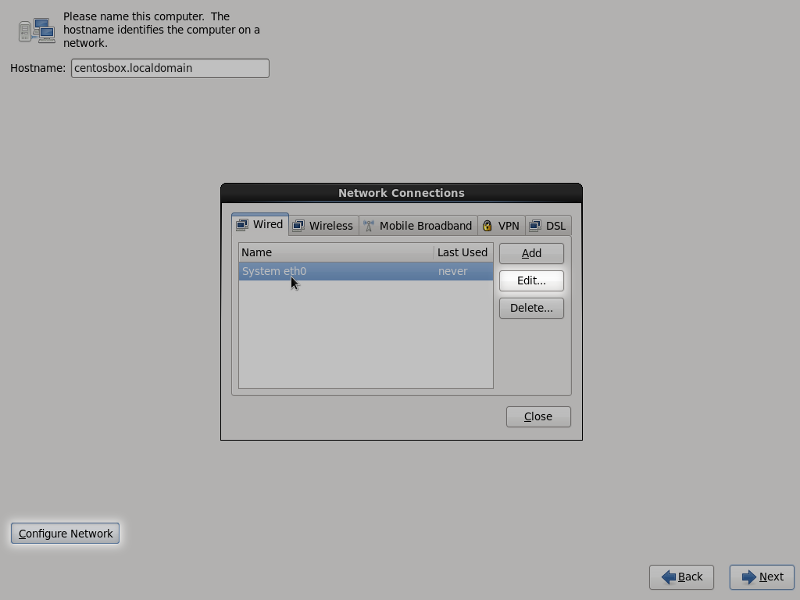
Configuring Network

Connect Automatically
Selecting TimeZone
In the next screen you have to select the Nearest City in your TimeZone , and click “Next”
(not screenshot included)
Choosing a Password For “root” Account
Now, provide a root password (WARNING: do not forget the password you provide in this step). After choosing a password, click “Next“. If you provide a weak password the system will warn you and ask to change it, although it also provides the option of using it anyways.
(not screenshot included)
Type Of Installation
Choose the type of installation you desire. I’ll be using “All Space“. If you know what you are doing, you might want to use a “Custom Layout” in order to have the disk distributed according to your Asterisk Installation’s requirements. The directory where you’ll store voicemail messages tends to grow quick, hence, on some systems you might want to dedicate a good amount of space to it.
After you click “Next” (if you didn’t checked the option for disk encryption or review the partition scheme), you will be warned about the partition options that you chose will be written to disk and that any data on deleted or reformatted partitions will be lost:

Choose Type Of Installation
Choosing a Set of Software
Choose the type of software you want to be installed. I recommend you to use “Basic Server“, but if you don’t have sound experience working with the Command Line Interface you might also choose “Minimal Desktop“. Get sure to click the “Customize Now” option at the bottom so we can pick a few extra packages that you will need later.
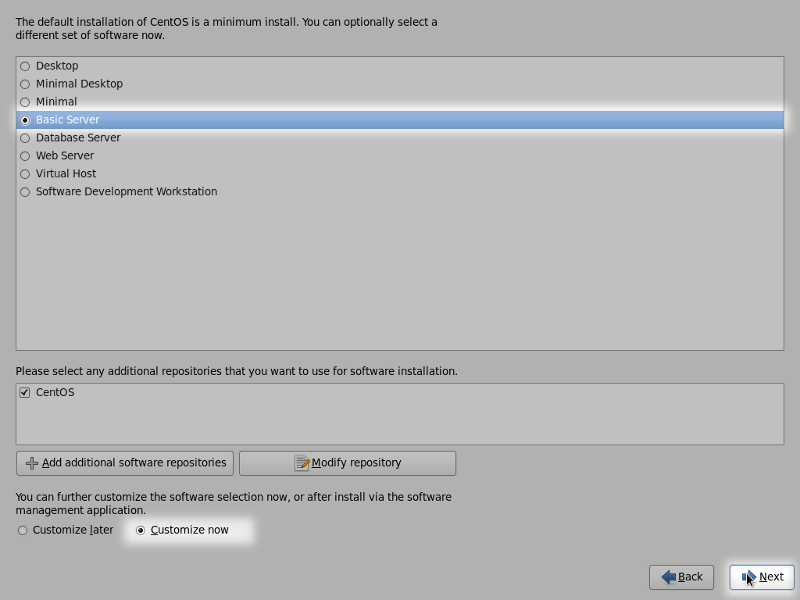
Choose Set Of Software
You will now be presented with a customization screen that will allow you to check/uncheck some packages that are grouped (left column) according to their nature:

Installation Customization
I recommend you to install the following packages, according to their group:
Applications (if you chose to install “Minimal Desktop“)
- Internet Browser
Base System
- Networking Tools
Databases (this will be helpful later to store the CDR)
- MySQL Database Client
- MySQL Database Server
Desktops
- Graphical Administration Tools (get sure to have this selected)
Development
- Additional Development
- Development Tools
Servers
- System Administration Tools
Proceeding With Installation
After selecting the desired software, click “Next“.
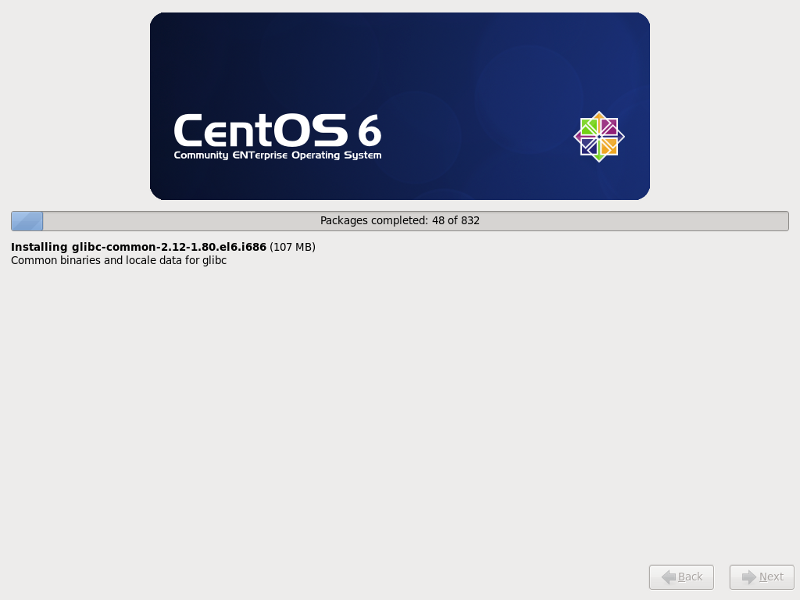
Installing Packages
After all packages are installed, the system will let you know that the process is complete. Press “Reboot” in order to use your new CentOS installation:
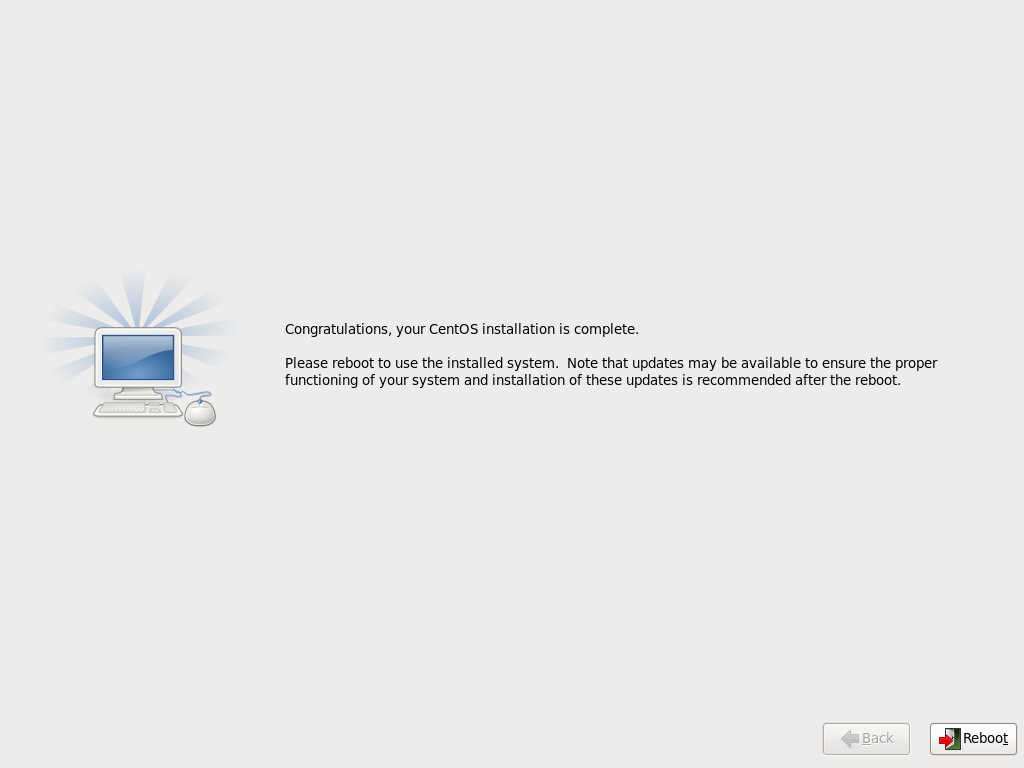
End of Installation
Final considerations:
- Once you have rebooted, remember that your username will be “root” and the password is the one you chose some minutes ago.
- If for some reason your network interface is not starting automatically, make sure
ONBOOT="yes"is in /etc/sysconfig/network-scripts/ifcfg-eth0 - If you need mouse support on the Command Line Interface, install the gpm package:
- Disable SELinux
span class=”st0″>’s|SELINUX=enforcing|SELINUX=disabled|g’
- update your system:
- update your system: